
How to edit the theme in WordPress?
Are you struggling to customize your WordPress theme to fit your unique style and branding? Don’t worry, you’re not alone. Editing a theme in WordPress can seem like a daunting task, especially for those who are new to website design and development.
WordPress is one of the most popular content management systems, powering millions of websites around the world. One of the great things about WordPress is its flexibility and the ability to customize the look and feel of your website through themes. However, many people find themselves overwhelmed when it comes to editing and customizing their chosen theme.
If you want to make your WordPress website truly your own, it’s important to understand how to edit the theme. By making simple changes to the design and layout, you can create a website that reflects your brand and stands out from the competition. In this article, we will walk you through the step-by-step process of editing a theme in WordPress, so you can confidently make the changes you desire.
What is WordPress?
WordPress is a popular content management system (CMS) that allows users to create and manage websites easily. It is highly flexible, customizable, and beginner-friendly, making it the platform of choice for millions of website owners around the world. With WordPress, users can choose from a wide range of themes to customize the appearance and layout of their website.
In this article, we will explore how to edit themes in WordPress, enabling users to customize their websites’ design and functionality to suit their specific needs. Whether you have a free or premium theme, editing themes in WordPress can be done with ease using the built-in theme editor or with the help of third-party builder plugins. Let’s dive in and learn how to edit the theme in WordPress step by step!
About Editing a Theme
WordPress provides a user-friendly platform for creating and customizing websites. One of the key elements of website customization is editing the theme to reflect your unique style and needs. In this guide, we will walk you through the process of editing a theme in WordPress.
Before diving into customization, it is important to take a few precautions. First and foremost, always backup your website to ensure that you can revert to a previous version if something goes wrong. Additionally, creating a child theme is highly recommended. This allows you to make changes without altering the original theme files, making updates easier in the future.
To start editing a theme, navigate to the “Appearance” menu in the WordPress dashboard. Here, you can choose the active theme or install a new one. Once you select the theme you want to edit, look for the “Customizer” or “Theme Editor” option. The customizer offers a user-friendly, visual editing experience with options to customize colors, fonts, layouts, and more. On the other hand, the theme editor allows you to modify the theme files directly.
It is important to note that editing theme files directly can be risky, especially if you are not familiar with coding. To avoid compatibility issues and future updates, consider using a child theme or custom CSS instead. Another recommended approach is using page builder plugins like Beaver Builder, which offers a drag-and-drop interface for easy customization.
For advanced users, custom codes can be added to the theme files using the theme editor or a child theme’s functions.php file. However, exercise caution and test your code on a staging environment before implementing it on the live site.
Choosing the Right Theme
Choosing the right theme is a critical step in creating a successful website with WordPress. The theme sets the overall visual tone and layout of your site, so it’s important to take the time to find one that aligns with your brand and meets your specific needs. There are a few key factors to consider when choosing a theme:
1. Purpose: Determine the purpose of your website and choose a theme that supports that purpose. For example, if you are building an e-commerce site, look for a theme with built-in e-commerce features.
2. Design: Consider the design elements that are important to you, such as color palettes, typography, and layout options. Look for a theme that offers customization options to make your site visually appealing and reflective of your brand.
3. Functionality: Assess the functionality requirements of your site. Do you need a theme that supports custom post types, navigation menus, or a specific page layout? Make sure the theme you choose has the features you need to create the site you envision.
4. Compatibility: Ensure that the theme you choose is compatible with the latest version of WordPress. Check user reviews and verify that the theme is regularly updated to avoid potential compatibility issues and security vulnerabilities.
5. Support and Documentation: Look for themes that come with comprehensive documentation and have a strong support system. This will be invaluable if you run into any issues or need help customizing your site.
By carefully considering these factors, you can choose a theme that not only looks great but also supports the functionality and goals of your website.
Free Themes vs. Premium Themes
When it comes to choosing a theme for your WordPress website, you have the option of free themes or premium themes. Free themes can be easily downloaded from the WordPress theme directory, while premium themes are available for purchase and often come with additional features and support.
Free themes are a great choice for beginners or those on a tight budget. They offer a basic design and functionality, allowing you to get your website up and running quickly. However, they may not have as many customization options or advanced features compared to premium themes.
Premium themes, on the other hand, are recommended for users who want more flexibility and customization options. These themes often come with a wide range of additional features, such as drag-and-drop interfaces, advanced design tools, and compatibility with popular builder plugins. Premium themes also typically come with professional support, ensuring that any issues or questions you have can be addressed promptly.
While free themes can be a good starting point, premium themes offer more options for customization and advanced features. If you’re serious about creating a professional and visually appealing website, investing in a premium theme is worth considering.
Understanding Your Needs and Goals
Understanding Your Needs and Goals: A Guide to Designing a Website That Delivers
When it comes to designing a website, understanding the needs and goals of your ideal prospects is paramount. Your website should cater to their wants and desires, providing a seamless user experience to keep them engaged and satisfied. To achieve this, regular reviews with your team become crucial.
Developing an ideal prospect profile is the first step in understanding your target audience. By creating detailed personas that represent your ideal prospects, you gain insights into their preferences, pain points, and expectations. This information then guides your UX design, ensuring that your website is tailored to provide value and meet their needs effectively.
Alignment is the key to success when it comes to website design. By regularly reviewing your ideal prospect profiles with your team, you ensure that the current website design remains suitable and aligned with their needs. This ongoing process allows you to identify any gaps or areas for improvement, which can then be addressed promptly.
By understanding your needs and goals, and regularly reviewing your ideal prospect profiles, you can design a website that not only meets their expectations but also delivers a memorable user experience. Remember, a website designed with your ideal prospects in mind is more likely to capture their attention, drive conversions, and ultimately contribute to your overall success.
Researching Available Themes
Researching available themes in WordPress is an essential step in designing and customizing your website. Luckily, WordPress offers a wide range of themes to choose from, allowing you to find the perfect design that suits your needs.
To start, navigate to the “Appearances” option in the WordPress dashboard. From there, select “Themes” to access the library of customizable themes. You can browse through the various options available, with different styles, layouts, and features.
In addition to the built-in themes, WordPress also provides an extensive library of downloadable themes. These can be explored and installed directly from the WordPress repository, giving you even more options to choose from.
Furthermore, you can expand your theme choices by using plugins and add-ons. These allow you to enhance and customize the appearance of your website even further. There are numerous plugins available that provide additional theme options and changes, giving you the flexibility to create a unique and personalized website.
Take the time to research and explore the various themes available in WordPress. By finding a theme that aligns with your brand and objectives, you can create an appealing and user-friendly website that effectively communicates your message.

Installing and Activating the Theme
After selecting a theme, the next step is to install and activate it on your WordPress website. Installing a theme is a straightforward process that can be done in a few simple steps. First, download the theme files from the appropriate source, whether it be from the WordPress repository or a third-party developer.
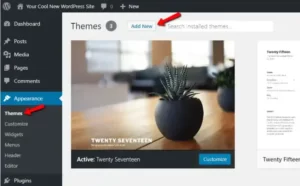
Next, navigate to the “Themes” page in the “Appearances” section of your WordPress dashboard. Click on the “Add New” button, then select the “Upload Theme” option. Choose the theme file you downloaded and click “Install Now.” Once the theme is installed, you can activate it by clicking on the “Activate” button. Your new theme is now live on your website, and you can begin customizing it to your liking.
Downloading the Theme Files
Downloading the theme files in WordPress is a necessary step if you want to make any edits to the theme’s code. Fortunately, this can be easily done through the WordPress dashboard.
To begin, access the theme editor by navigating to the ‘Appearance’ menu and selecting ‘Theme Editor’. This will open the theme editor, where you can make changes to the code of your active theme.
To download the theme files, locate the theme you want to edit in the theme editor. This can be done by selecting the current theme from the drop-down menu at the top-right corner of the editor. Once you’ve selected the desired theme, you should see a list of theme files displayed on the right-hand side.
To download the theme files, simply click on the “Download” button located at the bottom of the list. This will download a zip file containing all the theme files to your computer.
By downloading the theme files, you have now gained access to the code of your theme and can begin making any necessary edits or modifications. Remember to exercise caution when editing theme files and always create a backup of your theme before making any changes.
Installing the Theme from WordPress Dashboard
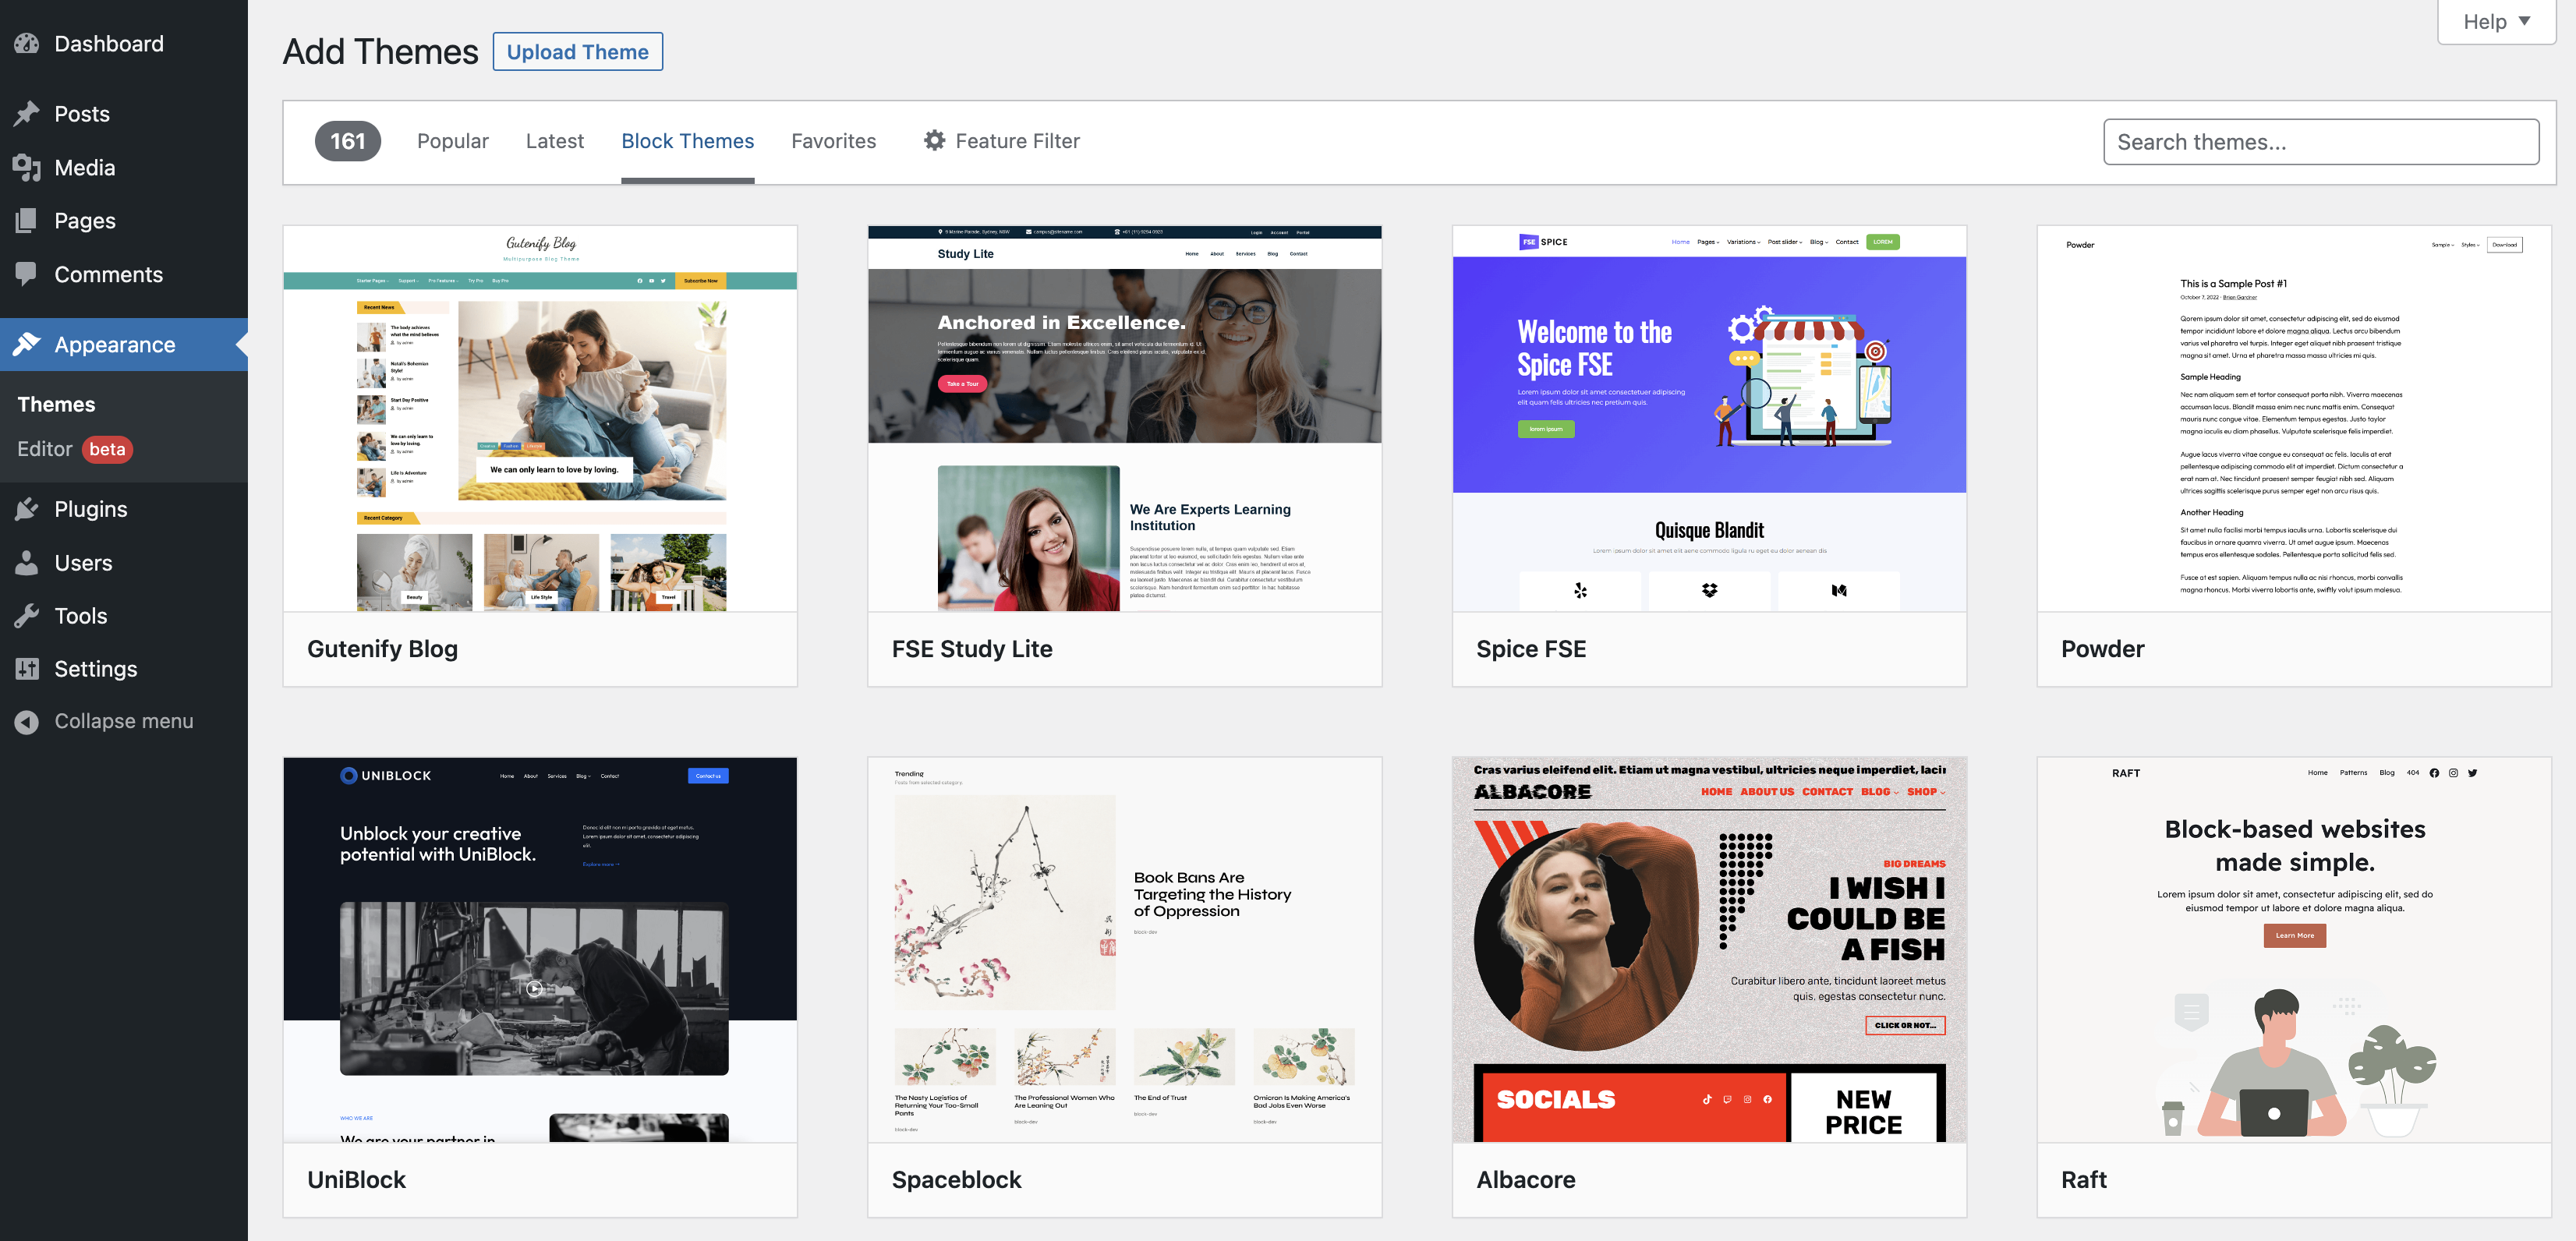
Installing a theme from the WordPress Dashboard is a straightforward process that allows you to customize the appearance of your website. To begin, log in to your WordPress Admin Dashboard and navigate to the “Appearance” section. Here, you will find the option to add a new theme.
Click on the “Add New” button to access the WordPress Theme Repository. From here, you can browse through thousands of themes available for installation. If you have specific requirements in mind, you can use the handy feature filter to narrow down your search.
The feature filter allows you to select specific criteria such as layout, colors, and subject matter. Once you have applied the desired filters, browse through the available themes and select the one that best fits your needs.
Once you’ve found your desired theme, click on the “Install” button. WordPress will automatically download and install the theme for you. After the installation is complete, you can activate the theme and start customizing its settings according to your preferences.
Installing a theme from the WordPress Dashboard is a quick and convenient way to change the appearance of your website. With the feature filter and a wide range of themes available, you’re sure to find the perfect look for your website.
Activating the Theme in WordPress Dashboard
To activate a theme in the WordPress dashboard, start by accessing the WordPress Admin Dashboard. From there, navigate to the Appearance menu and select “Themes” from the dropdown options.
You will be taken to a page displaying the current theme, active theme, child themes, and other installed themes. Look for the theme you want to activate and click on the “Activate” button next to it. This button is usually located in the top-right corner of the theme preview.
Once you click the “Activate” button, the selected theme will be activated, and its design will be applied to your website. You can now customize various settings and appearance options specific to the newly activated theme.
Keep in mind that activating a new theme may affect the layout and overall look of your website. Therefore, it is advisable to preview the theme on your staging environment before activating it on your live site. This precaution will help avoid any compatibility issues or unwanted changes.
By following these simple steps, you can easily activate a theme in the WordPress dashboard and enhance the design and functionality of your website.
Understanding Child and Parent Themes
In WordPress, a child theme is a theme that inherits the characteristics and functionality of a parent theme. It allows for customization without losing any changes when the parent theme is updated. This is beneficial because it allows users to make modifications to their website’s design and functionality while still being able to take advantage of updates and improvements made to the parent theme.
To create a child theme, follow these four steps:
1. Create a new folder: Start by creating a new folder in your WordPress theme directory. This will serve as the location for your child theme files.
2. Add a stylesheet: In this new folder, create a stylesheet file. This file will contain the necessary information to identify the theme as a child theme. You can simply copy the header from the parent theme’s style.css file and modify it to reflect the child theme’s information.
3. Copy and edit desired files: To customize the child theme, you can copy any template files from the parent theme into the child theme folder. From there, you can edit these files to make the desired changes to the design or functionality of your website.
4. Activate the child theme: Once the child theme folder and stylesheet are set up, you can activate the child theme from the WordPress dashboard. Simply navigate to the Appearance menu, locate the child theme, and click the “Activate” button.
By understanding the concept of child and parent themes in WordPress and following these steps, users can easily create a child theme to customize their website’s design and functionality without losing any changes when the parent theme is updated.
Customizing the Existing Theme
One of the advantages of using WordPress is the ability to easily customize the appearance of your website through themes. However, sometimes the pre-designed themes may not perfectly align with your vision. In such cases, it becomes necessary to customize the existing theme to make it more personalized and unique. In this article, we will explore various methods to edit and customize your current theme in WordPress.
1. Utilize the Theme Customizer:
The first step towards customizing your existing theme is to access the Theme Customizer. This feature allows you to modify various aspects of your theme, including colors, fonts, header image, and more. To access it, go to the WordPress dashboard, navigate to the Appearance menu, and select “Customize.” From there, you will find a range of customization options that you can tweak to align with your desired design.
2. Edit the Theme Files:
For more advanced customizations, you can directly edit the theme files. This method requires a basic understanding of HTML, CSS, and PHP. To edit the theme files, access the WordPress theme directory through FTP or the file manager in your hosting control panel. Locate the theme folder you want to customize and make the necessary changes to the template files. However, it is essential to exercise caution while editing the theme files to avoid any accidental errors that may cause your website to break.
3. Create a Child Theme:
Creating a child theme is a recommended approach for extensive customizations. A child theme allows you to make changes to your current theme without modifying the original files. By creating a child theme, you can avoid losing your customizations when the parent theme is updated. Follow the four steps mentioned earlier to create a child theme, and then utilize the child theme’s stylesheet and template files to make the desired modifications.
4. Use Theme Builder Plugins:
If you prefer a more intuitive and beginner-friendly method, you can opt for theme builder plugins like Beaver Builder or Elementor. These plugins provide a drag-and-drop interface, allowing you to customize various aspects of your existing theme without any coding knowledge. You can modify the layout, design elements, and even add custom codes effortlessly using these plugins. Additionally, they offer a wide range of pre-designed templates and blocks that can be easily customized to suit your needs.
Working with Navigation Menus
In addition to customizing the appearance of your website through themes, WordPress also allows you to easily create and manage navigation menus. Navigation menus are essential for organizing your website’s pages and providing a seamless browsing experience for your visitors. In this article, we will explore how to work with navigation menus in WordPress.
To get started, access the WordPress customizer panel by going to your WordPress dashboard and selecting the “Menus” option. From there, you can create custom menus and add them to your website’s header, footer, or any other designated areas.
In the customizer panel, you will find a user-friendly interface that allows you to easily add or remove menu items, rearrange their order, and even create sub-menus. You can choose from existing pages, posts, categories, or custom links to populate your menus.
Furthermore, the customizer panel lets you customize the appearance of your navigation menus by adjusting settings such as colors, fonts, and alignment. This ensures that your menus seamlessly integrate with the overall design of your website.
With WordPress’s intuitive navigation menu functionality, you can create, customize, and manage your website’s navigation menus with ease. So, take advantage of this feature to enhance the user experience and make your website more navigation-friendly.
Editing Menu Appearance in WordPress Dashboard
To edit the appearance of your menu in the WordPress Dashboard, follow these steps:
1. Start by accessing the WordPress Customizer. Go to your WordPress Dashboard and navigate to “Appearance” -> “Customize”.
2. In the Customizer panel, look for the “Menus” option and click on it.
3. Here, you will find various settings and options to tweak your menu’s appearance.
4. To modify existing menu items, click on the menu item you want to edit. You can then change its label, URL, and other attributes.
5. To add new menu items, click on the “Add Items” button. You can choose from different content types such as pages, posts, categories, or even custom links.
6. Additionally, you can rearrange the order of the menu items by dragging and dropping them into the desired position.
7. To choose where the menu will be displayed on your website, select the appropriate menu location from the available options.
8. Finally, don’t forget to click on the “Publish” or “Save & Publish” button to save your changes and make them live on your website.
By following these steps, you can easily customize the appearance of your menu using the WordPress Customizer in the Dashboard.
Adding Custom Fields to Post Types
To add custom fields to post types in WordPress, follow these simple steps:
1. Start by accessing the WordPress Dashboard and navigate to the post or page you want to add custom fields to.
2. Once you’re in the WordPress Block Editor, look for the Post/Page Settings tab, usually located on the right-hand side of the screen.
3. In the Post/Page Settings, you will find a dropdown list with different options for custom templates. Select the desired custom template that you want to assign to the post or page.
4. By selecting a custom template, you can effectively change the layout and add specific custom fields to that post or page.
5. After selecting the custom template, you can then proceed to add the desired custom fields associated with that template. These fields can include various types of data, such as text, images, checkboxes, or dropdown menus.
6. Custom fields provide a way to extend the functionality and flexibility of your post or page, allowing you to tailor it to your specific needs.
7. Once you have added the custom fields, don’t forget to save or update the post or page to apply the changes.
Adding custom fields to post types in WordPress gives you the ability to create unique layouts and add additional information or functionality to your content. It allows you to customize the way your posts or pages are displayed and enhances their overall performance.
Final Thoughts
Editing the theme in WordPress is an effective way to quickly customize the look and feel of your website. With its intuitive navigation menu functionality, you can easily create, manage, and customize your menus to enhance user experience. Additionally, custom fields allow you to add additional features and data to any post or page which gives you the ultimate flexibility over how your content is displayed.